First Published in part in Needle Arts June 2022
Copyright 2021-2022
MvRY/Mevanou verch Reys Yriskynit-Tina M Comroe
The importance of decolonizing my viewpoint
As a white woman of northern European genetics, it is Very important that I go forward in this project with Respect, granting the indigenous peoples of India the dignity and voice so deserved in regards to their historical and modern arts. I definitely wanted to do some research into the whitework of India before just jumping in feet first.
Truth be told, there’s not much “out there” that isn’t thoroughly whitewashed, most books printed for the European market have Chikankari listed under the “shadow work” technique as if the closed herringbone stitch is the only stitch used. Knowing that there’s more to the technique, I found myself obsessed with the subject. Firstly, I had to purchase books from the UK online markets as many of the titles were not to be found in the US at any price, nor inter library loan. A few of those titles were written by a single author: who had the worst stitch diagrams, in the history of stitch diagrams! Then there was teaching the Google Algorithm how to find Indian Whitework Embroidery, Chikan Work, and Chikankari so that it would stop asking me “Are you sure you aren’t looking for Chicken Curry?” I went ahead and added Hindi in the language search so that Google would also stop asking me if I wanted English Whitework. I read college dissertations translated to English so that I could see for myself some of the history being rediscovered and decolonized.
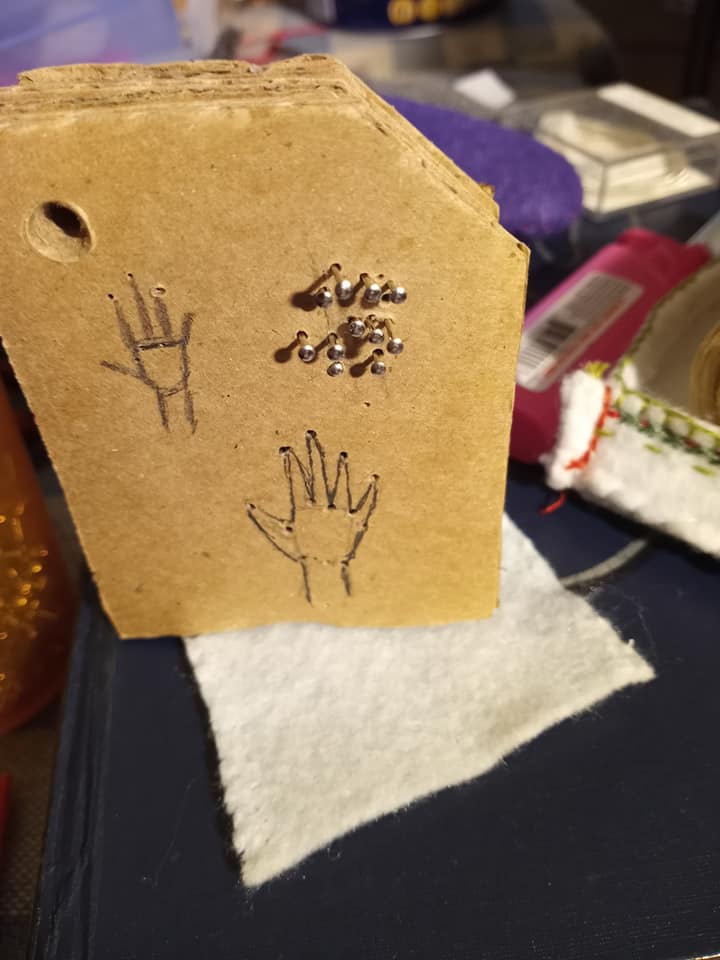
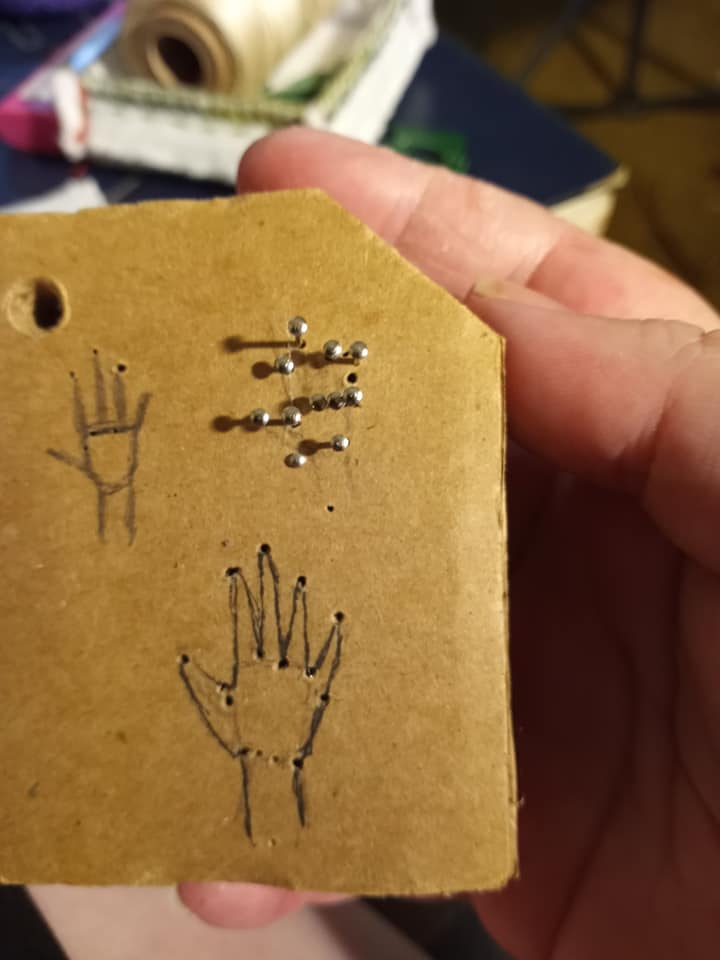
For several months, there was much watching YouTube videos with the sound off because they don’t have subtitles, which was worth it just to get a sense of the stitches themselves. I watched the hands of the embroiderers many times for hours on end. Those with western equivalents were diagrammed by easily drawing them by hand. Am I a bit obsessive? Yes, but I am a visual learner, so I learn by seeing it done and if those hands drawing the stitch diagrams are my own, so much the better.
Let’s begin with some earlier references, shall we?
The indigenous peoples of India have been producing whitework embroidery, centuries before a succession of colonizing invaders left their marks and took credit for what was already there. Historians from those colonizing invaders has it that Indian whitework was introduced by the First Mughal Empire or taught by English women wanting cheaper Ayrshire work. You can’t have it both ways. So, after searching for months I found snippets here and there that when added together gave me a better picture of a more probable history. Embroidery has been a craft in India for far longer than modern history gives credit to.
Contained within the1500-1000 BCE Sanskrit Book of Hymns called the Rig-Veda is a hymn Raka, the Goddess of the Moon; A supplication that the needles of gold, copper or bronze not break, so that the work when finished may give the wearer reason for praise.
“With eulogy I call on Raka swift to hear may she, auspicious, hear us, and herself observe. With never-breaking needle may she sew her work, and give a hero son most wealthy, meet for praise.[1]
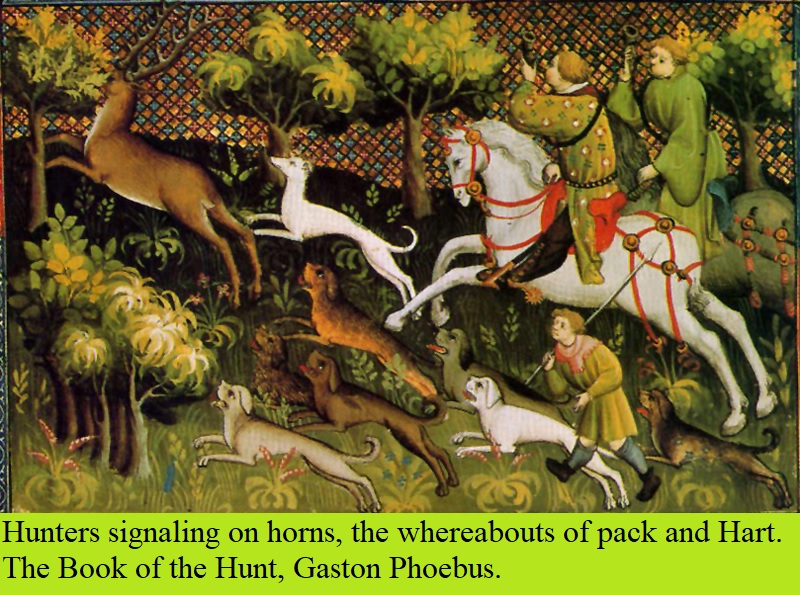
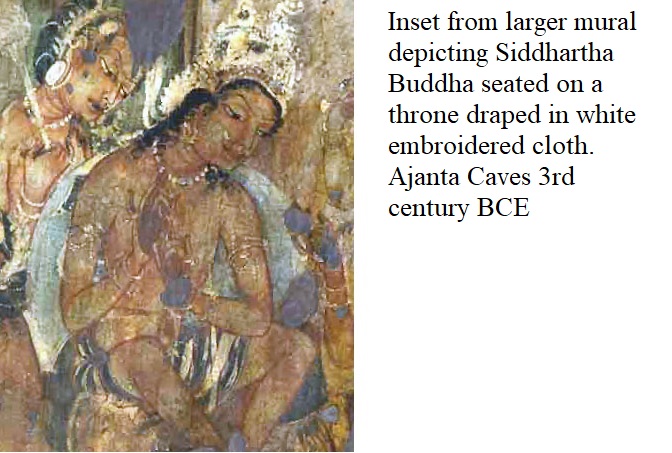
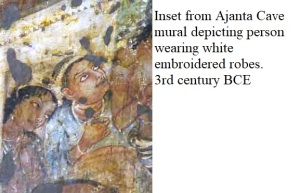
Inside caves carved and painted starting in the 5th- 3rd century BCE located in Ajanta are murals showing whitework embroidery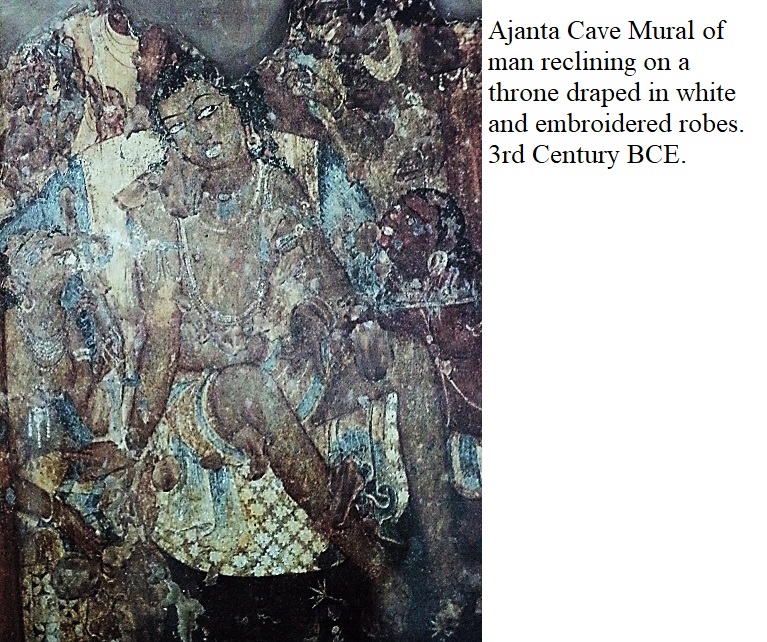 on textiles worn by religious and secular figures.[2]. These caves were rediscovered by a British soldier, who was out hunting tigers in 1819. [3] Unlike Mohenjo Daro, these caves were not looted by the British Museum and so the paintings and statuary halls are intact in situ.
A Greek diplomat of 3rd century BCE by the name of Megasthenes mentions the use of flowered muslins by Indians. He visited India sometime between circa 302BCE and 288BCE. As well as being an ambassador of Seleucus Nicator I, He was a self-styled Historian and Indian Ethnographer. While in the court of Chandragupta Maurya, Megasthenes compiled information about India in a book Indika, which is now a lost work and only survives in Fragmentary quotes used by contemporary writers in their books.
Megasthenes Quote:
“In contrast to the general simplicity of their style, they love finery and ornament. Their robes are worked in gold, and ornamented with precious stones, and they wear also flowered garments made of the finest muslin. Some have attendants walking behind hold up umbrellas over them: for they have a high regard for beauty, and avail them of every device to improve their looks.[4]
More Ajanta Cave Art


Ajanta Cave 1, hall, left wall. Kalyanakarin, EPISODES 9, 10, 12. Episode 9 (centre): ‘In the palace, the king is hearing from the princess with utter amazement of the restoration of Klyanakarin’s eyesight.’ Episode 10 (left of centre): In the queen’s palace, the princess is telling her mother of the happening.’ Episode 12 (right): ‘Kalyanakarin is leaving his father-in-law’s palace in a splendid procession, to return to his father’s kingdom.’ (#41, Schlingloff 2013, vol. I, 191-92)
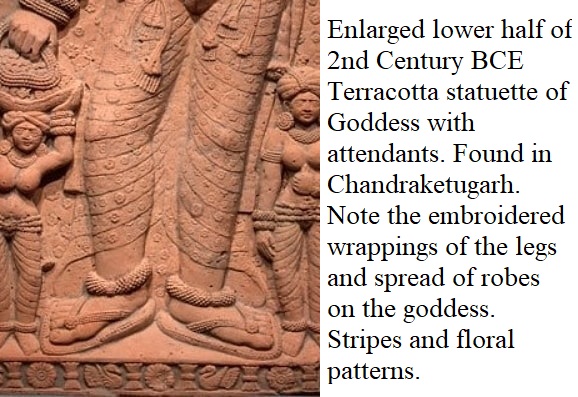
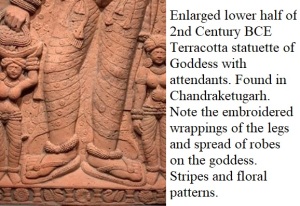
Chandraketugarh
Archologists have uncovered hundreds of 2nd Century BCE Plaques from Chandraketugarh, which show the fashions in superbly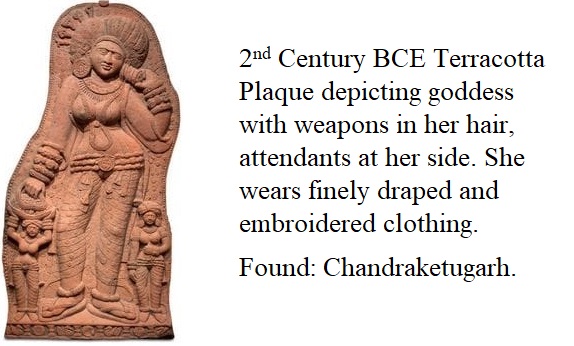 fashioned Terracotta. Many of which show clear evidence of fine woven garments wrapped, draped and seamed as well as embroidered in floral motives. Many molds have been found for the production of such plaques.[5]
Embroidery Described in Poetry
The 6th century CE poet Banabhatta in the court of Harshavardhana wrote and autobiographic and biographic poem in Sanskrit in which whitework embroidery is mentioned. Translated in 1895 the romantic autobiography tells the tale of the King, himself and the daily life of the people and goddesses he met. When Harshavardhana met the goddess Lakshmi, the poet Bana wrote this:
“Out of a dazzling white silken robe, embroidered with hundreds of diverse flowers and birds, and gently rippled by the motion of the breeze, her form rose up as from an ocean’s waters”.[6]
Folk Stories that show the Heart of the matter
In Indian folk stories, there is a story of a traveler who taught Chikan to a peasant in return for drinking water. The traveler was so impressed with the generosity, humility and kindness as well as the peasant’s hospitality that they taught them Chikan so that they might never be poor again.
Noor Jahan
The most popular and somewhat factually checkable story is that of Noor Jahan, the twentieth and last wife of Mughal Emperor Jahangir, who introduced Persian art in India, specifically in Oudh in the 17th century.[7] Although the Mughal Empire did influence the artists and embroiderers of India during their time (1526-1857), giving Indian Whitework Embroidery it’s modern name Chikankari, which gained it’s GI (geographical indicator )registration in 2008,[8] , they did not teach whitework embroidery to the indigenous peoples of India, nor, did the husband hunting Victorian Englishwomen who traveled to India.
What it is and Where it is going
Indian Whitework started as a white-on-white embroidery form, just like all whitework embroidery around the world. The favored fabrics were muslin or Mulmul (the modern muslin used in quilting would be correctly called Calico and is too thick for this technique) as it was suited to the warm, slightly humid climate. The influence of Mughal architecture gave the embroiderers the iconic Floral Bhuti and open latticework for inspiration. After the downfall of the Mughal Empire, Chikankari artisans spread all over India, but Lucknow remained the main center, with Awadh a close second. The Other two places named in the manufacture of Chikankari are Delhi and Mumbai.
Chikankari has survived the loss of Royal Patronage, suffered deeply at the hands of colonial commercialization, lost its way sometimes in mediocrity, and yet stayed alive. Chikankari is a tribute to the skill and will of craftspeople who have handed down this technique from one generation to another. Today, the 300+-year-old art form has a firm presence in the Indian and global fashion arena. Stitches: Due to the variety of stitching styles involved in Chikankari, it is claimed to be one of its kind hand embroidery which is impossible to imitate in any other part of the world. Chikan embroidery is said to have forty stitches, to which they have given delightfully fanciful names: double-star earring, cowrie shell, peacock feather eye.[9] I have only delved deep enough to find twenty-two. The rest of the stitches when taken into perspective are in fact combinations of the other twenty-two, named for the different flowers, bangle bracelets, earrings and other shapes found in nature.
Modern Chikan embroidery has several steps from starting and completion.
A. 1. Cutting the cloth. Done by men.
B. 2. Sewing the garment. If sewn by women it’s destined for Chikan work.
C. 3. Stamping the cloth. Done by men.
D. 4. Embroidering. Done by many women, each proficient in either a single stitch or decorative element often passed from hand to hand in the same workshop. Most embroiderers of Chikan know only one form of work that employs, typically, no more than five stitches, and commonly only one sketchily executed. The main forms of work are Bakhia work, Murri work, Jaali work, Phanda work, and Tepchi work. [10]
E. 5. Washing and Starching.
And once finished it goes to the shop or patron who ordered the work.
Stitch Encyclopedia
Ulti Bakhia- Shadow work done on the backside utilizing closed herringbone stitch.
Sidha Bakhia- Shadow work done from the Front side, utilizing the double back stitch. Note: The difference between the closed herringbone and the double back stitch is not technical, but visual; depending entirely on the side of the cloth that is visible.

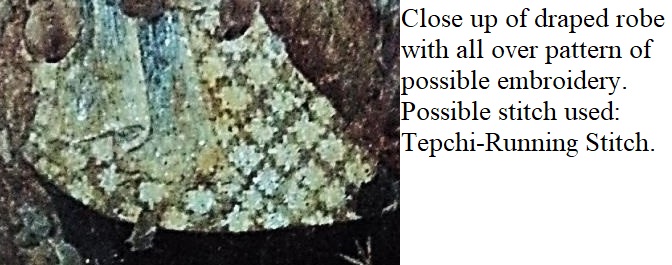
Tepchi- Running stitch. Tepchi work is often done in such a fine running stitch as to look part of the woven fabric it’s embroidered on.

Pechni- wrapped running stitch.

Siddaur-Jaali- Use a rather coarse needle and quite fine thread to emphasize the tiny holes that are characteristic of this stitch.

It is used to make the openwork filigree trellis that is so iconic to Chikan work, with one exception. The Embroiderer starts stitching the bottom row and does not repeat the steps, but continues stitching right to left until the end of the row. Then turn the work and continue to fill the shape from right to left, making sure to tug the thread to create evenly spaced holes, using an awl if needed.
Hathkati Jaali: a single line of openwork similar to insertion used inside leaves stems and flowers. Its western equivalent is the so-called Belgian Stitch, which is worked in curved or straight lines similar to insertion stitch. It consists of a series of back stitches drawn very tight over a certain number of threads of the material.[11]

Phanda – Seed stitches utilized to create millet seeds of varied sizes. Can use just the seed stitch or vary the layering of the seed stitch to imitate the different sizes of the millet. Often used as a filling in large flowers or paisleys. The Phanda is often mistaken for the French-knot.

Dhariya Phanda: Oval shaped seed stitches along stems in thick thread to form Coriander Seeds.
Chikna Phanda: See Tuppa: 6-layer seed stitch worked in padded satin stitch for a really raised effect, used as the center of combination Kharan Phool and Keel.
Kacha Phanda/ Dhari Phanda: seed stitch of 2 stitches also used in combination of Meharki.
Ghas Patti- Leaves worked in two different fishbone stitches.


Maang Patti-Leaves worked in fly stitch.

Dhoom Patti- Leaves worked with twice layered open herringbone stitched on the front side of the fabric. Start at one end and work the open herringbone stitch then return to the starting point and fill in the open areas with another layer of open herringbone stitch to close it in.
Balda- A very fine and narrow satin stitch worked over running stitches.

Murri- Rice shaped seed stitches utilizing tiny detached chain stitch covered with short whip stitches covering the first stitches, starting at the thick end.
Sada Murri- Knotted back stitch/knotted running stitch. Created by working the coral stitch tightly packed over a running stitch.
Mundi Murri- larger murri stitch performed with a tightly packed satin stitch over a thick running stitch to produce thicker flower pistils or petals.

Hool- Fine detached eyelets; often surrounded by other stitches making it the hub of a wheel.

Kaaj- Buttonhole/Blanket stitch mainly used to create larger circular patterns.

Gitti- Buttonhole eyelet. Used at the centers of flowers, or as the hub of a wheel decoration.

Joda- Buttonhole Stitched leaves. It is worked with the points on the inside of the leaves giving the leaves a smooth outside line.
Rahet/Banarsi- Stem stitch performed either with fine thread from the front of the fabric or in 6 strands of thick thread from the back forming a solid line on the front, giving a thicker shadow from underneath.

Janjira/Zanjeera- Narrow chain stitch used as an outline often combined with pechni or thick lines of Tepchi. Janjira is often worked with silver or gilt threads to give sparkle.

Khatau- White on white needle turned appliqué. It is used to provide different layers of opacity.

Tuppa- Straight parallel often padded satin stitch filling for the center of Keel.

Turpai- Hand Stitched Seams using a fine thread.
Embroidery stitches without Western Equivalents.
Kangan-
Stitched using 3 strands of thread, it creates a slice of pie around the chikna phanda.

Combinations
I feel I must apologize for the crudeness of my drawings, they will eventually be replaced by pictures of the embroidered samples.
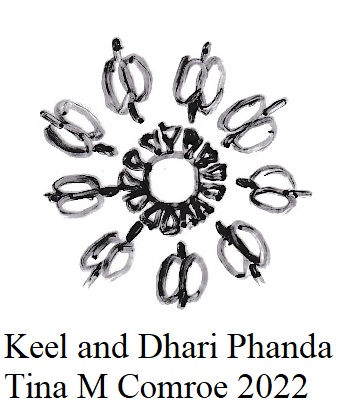
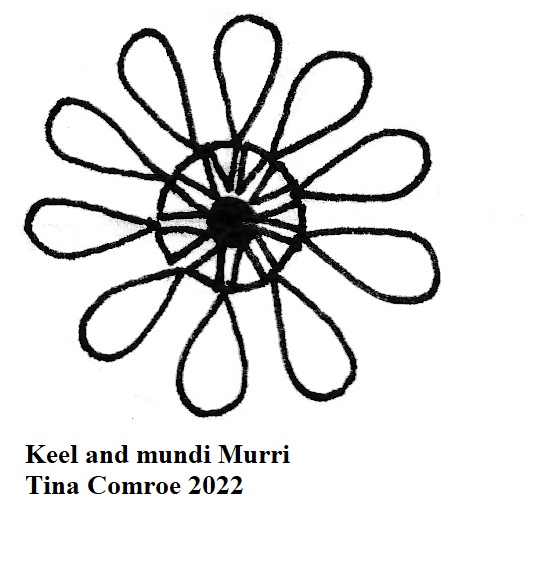
Chameli Phool: Jasmine Flower


Stitches: variation 1: Keel and Dhari phanda.
Variation 2: Keel and Mundi Murri
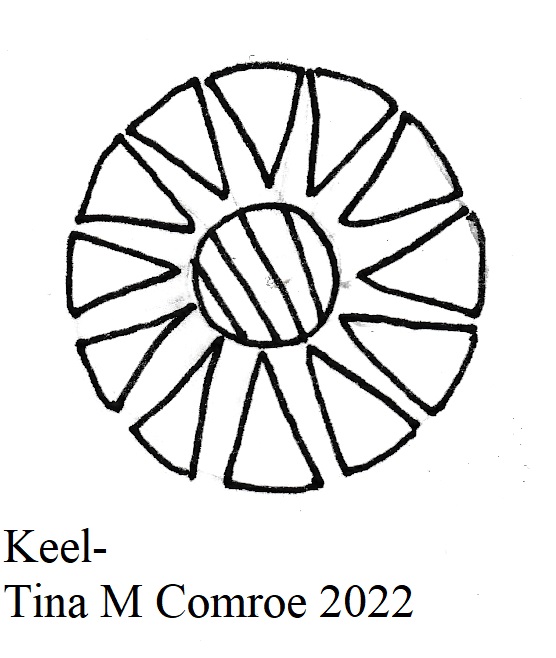
Keel:
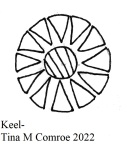
Stitches: Chikna Phanda with Kangan The keel is often combined with several other stitches to create different forms or by itself as an overall ornament.
Bara Kangan: Bangle Bracelet.

Stitches: Center Keel, then Hathkati Jaali and another layer of Kangan, finally large Dhari phanda with stems.
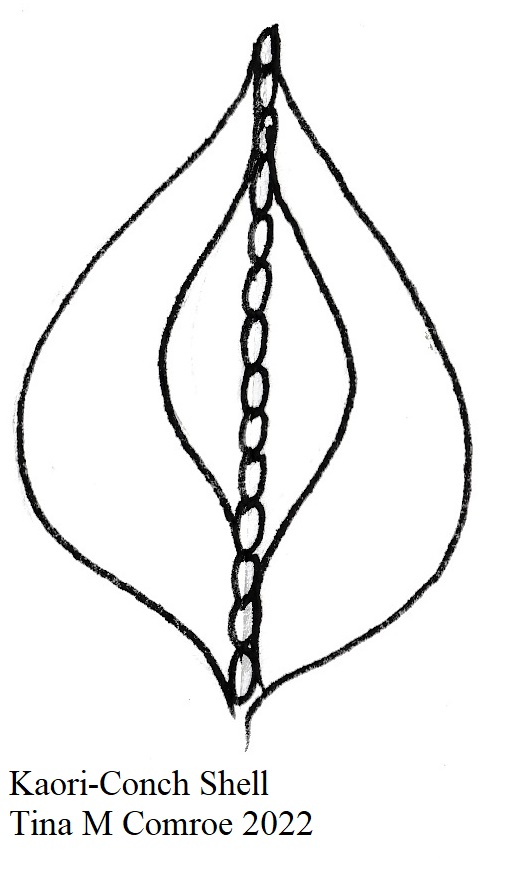
Kaori: Conch
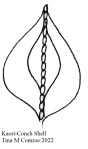
Stitches:
A. Flat: Side sepals in fishbone stitch, center of Hathkati Jaali.
B. Embossed: Side sepals in padded satin stitch, center of Hathkati Jaali.
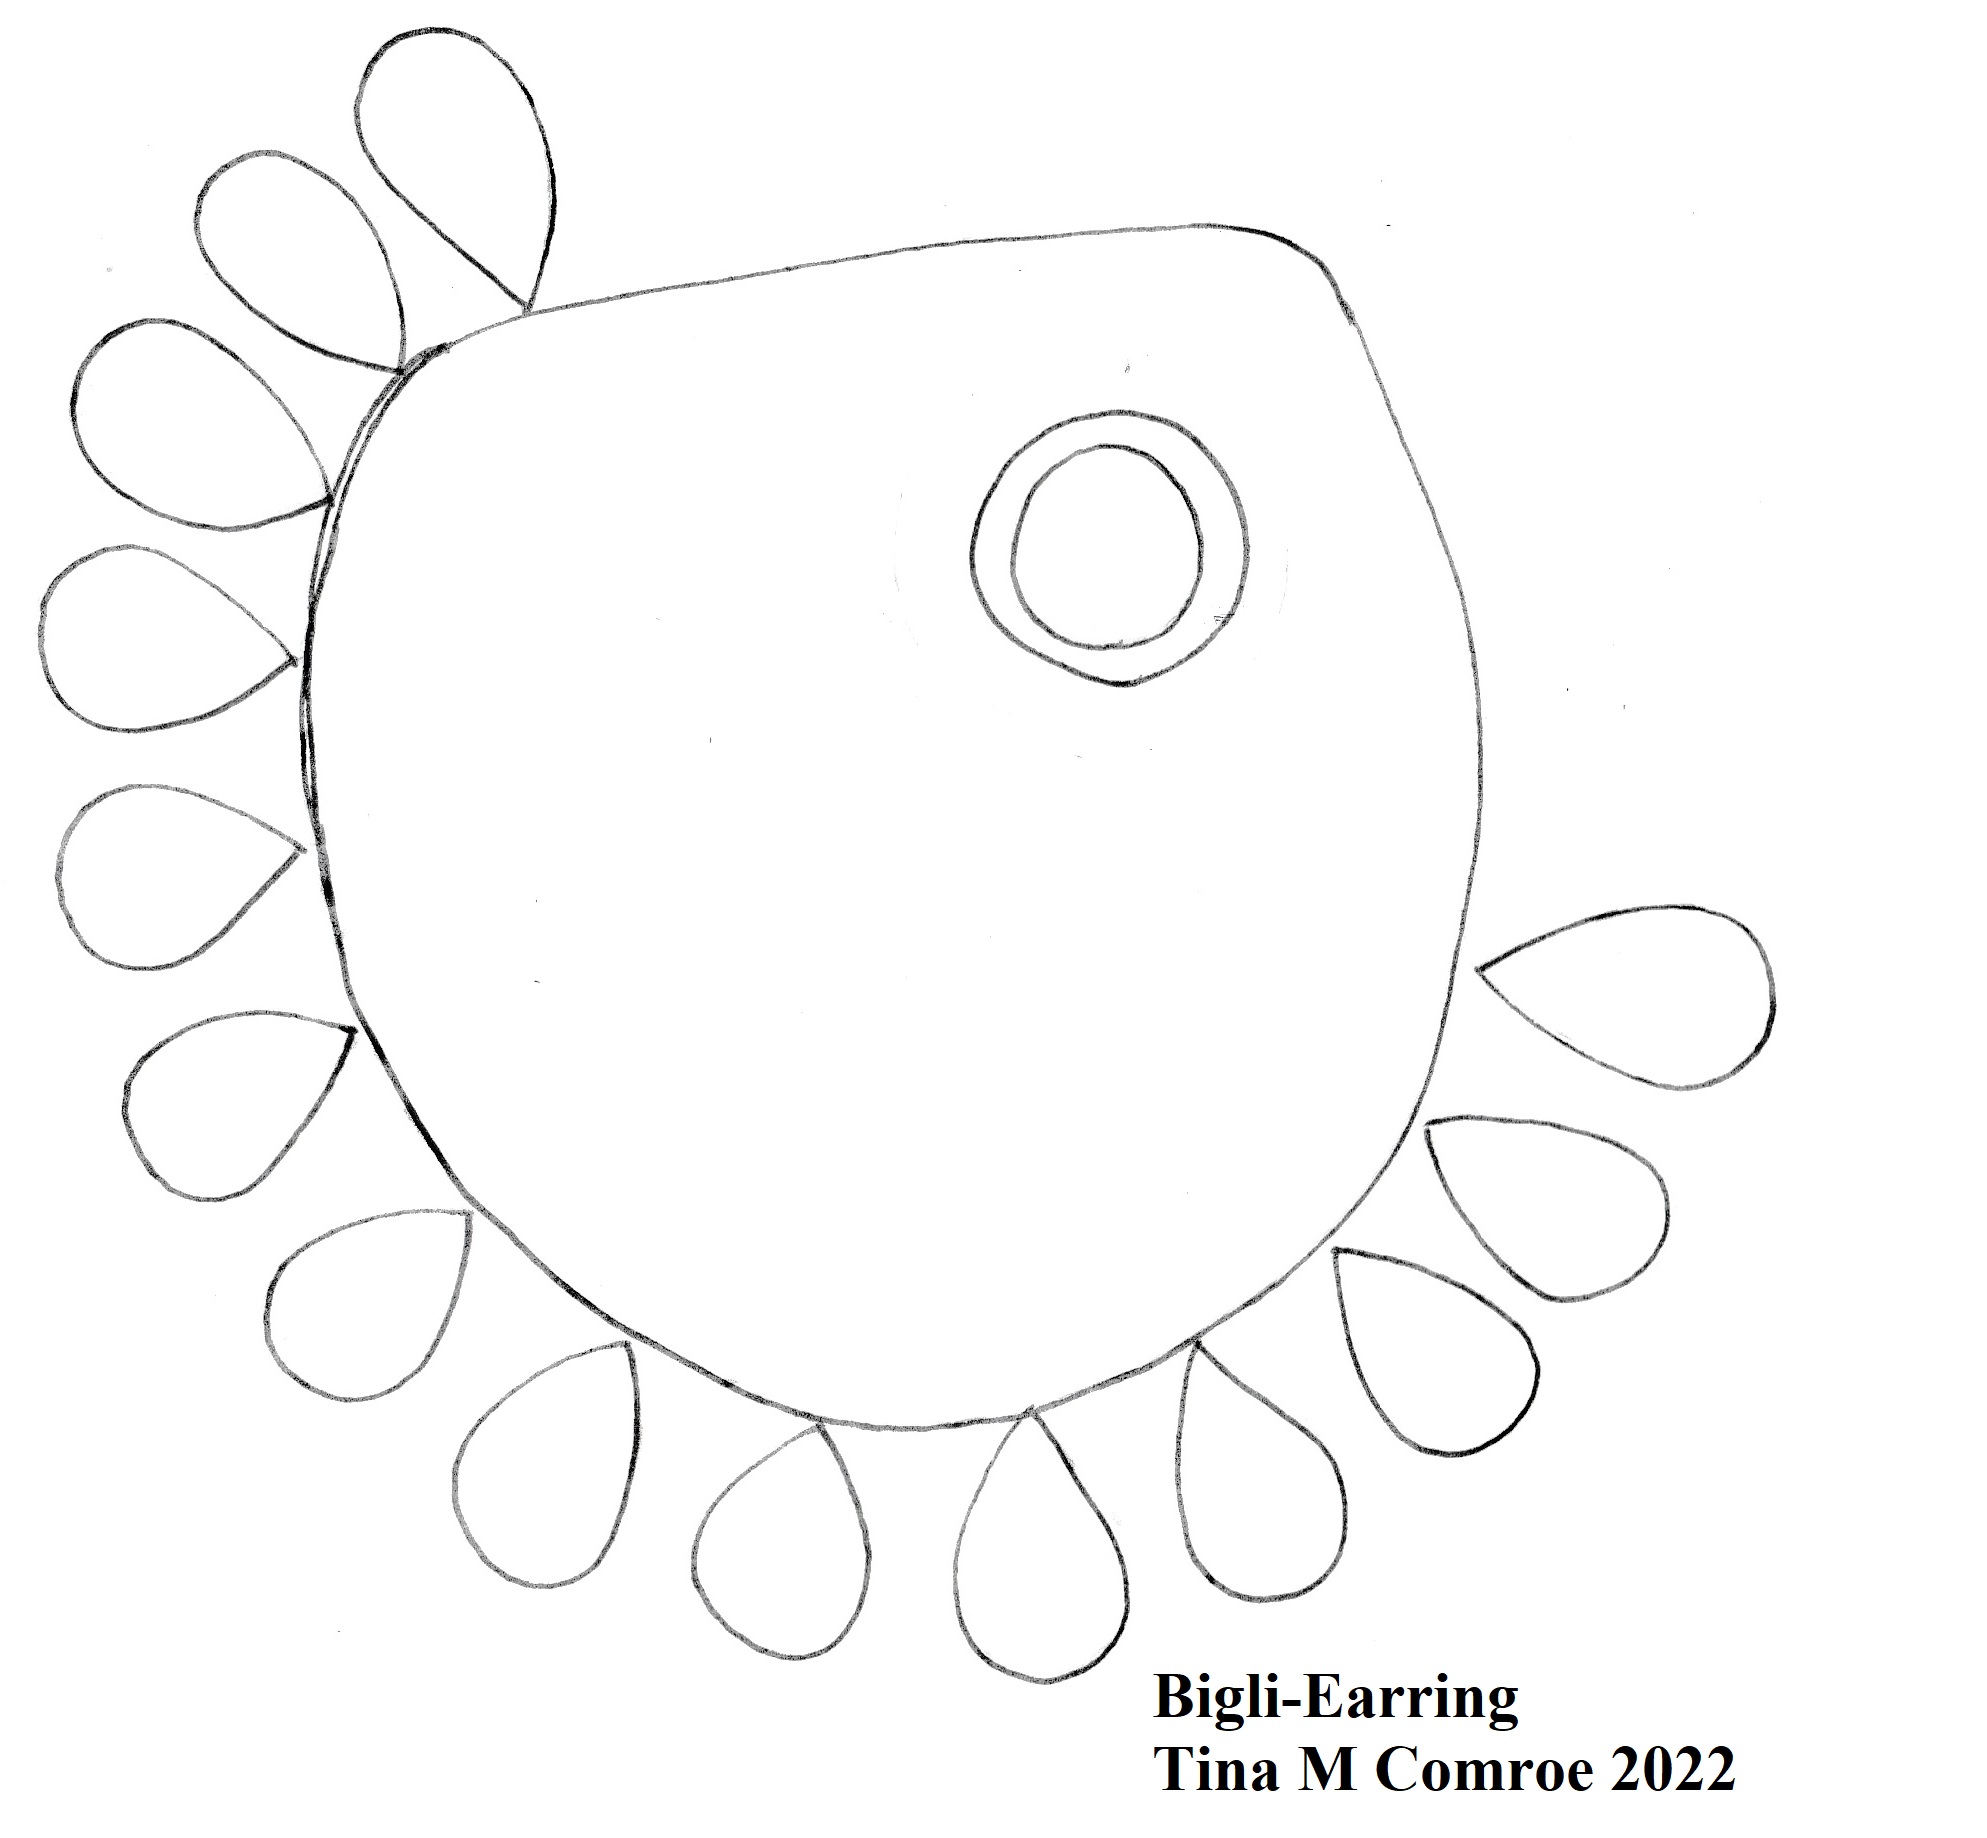
Bijli: Earring:

Stitches: Hool, padded satin stitch, mundi murri: Kangan stitch or Dhari phanda can also be used.
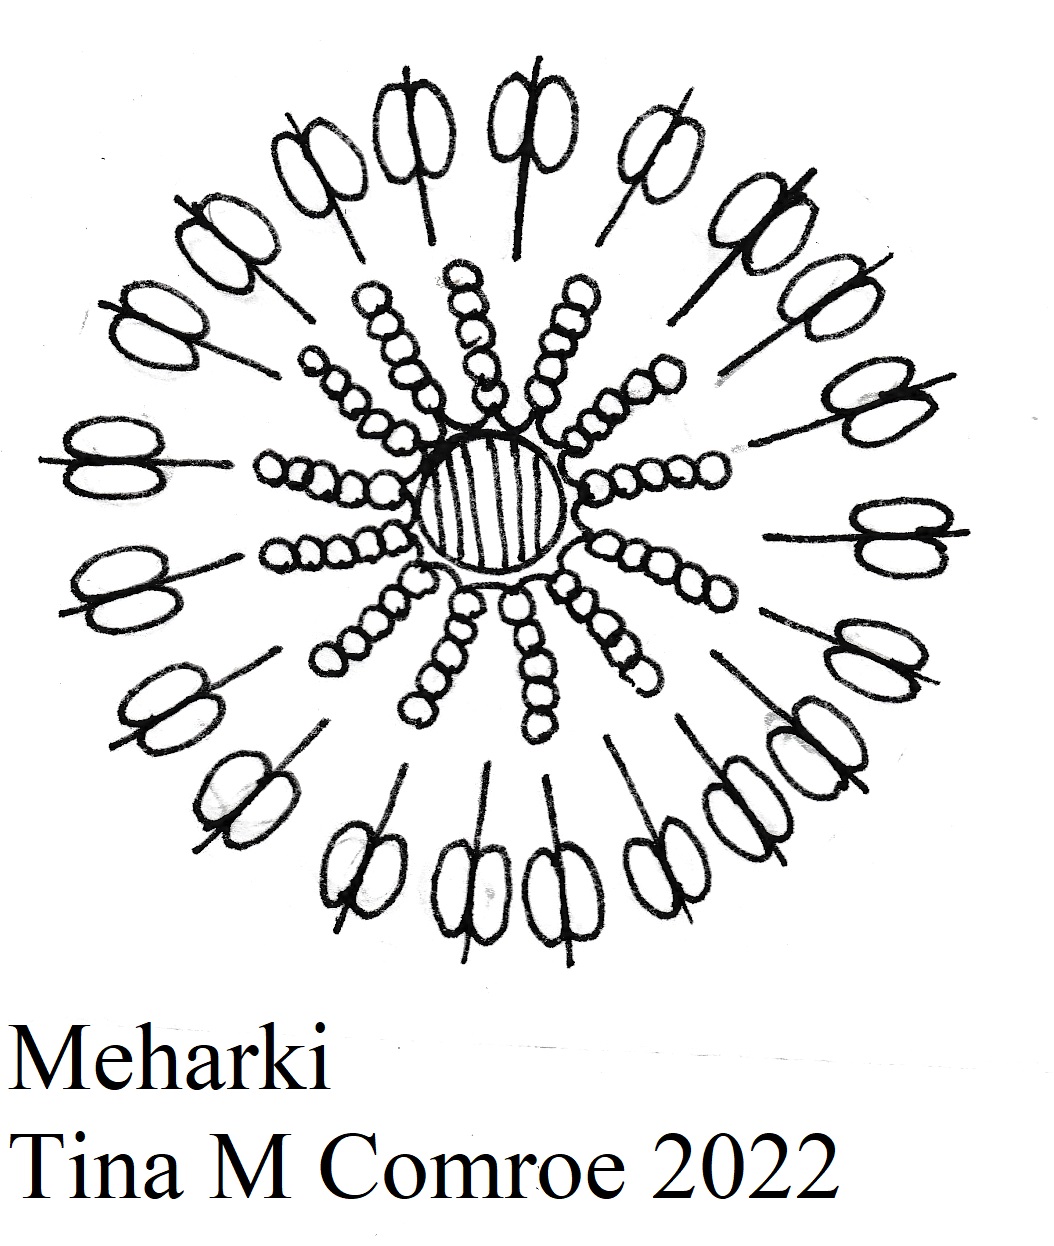
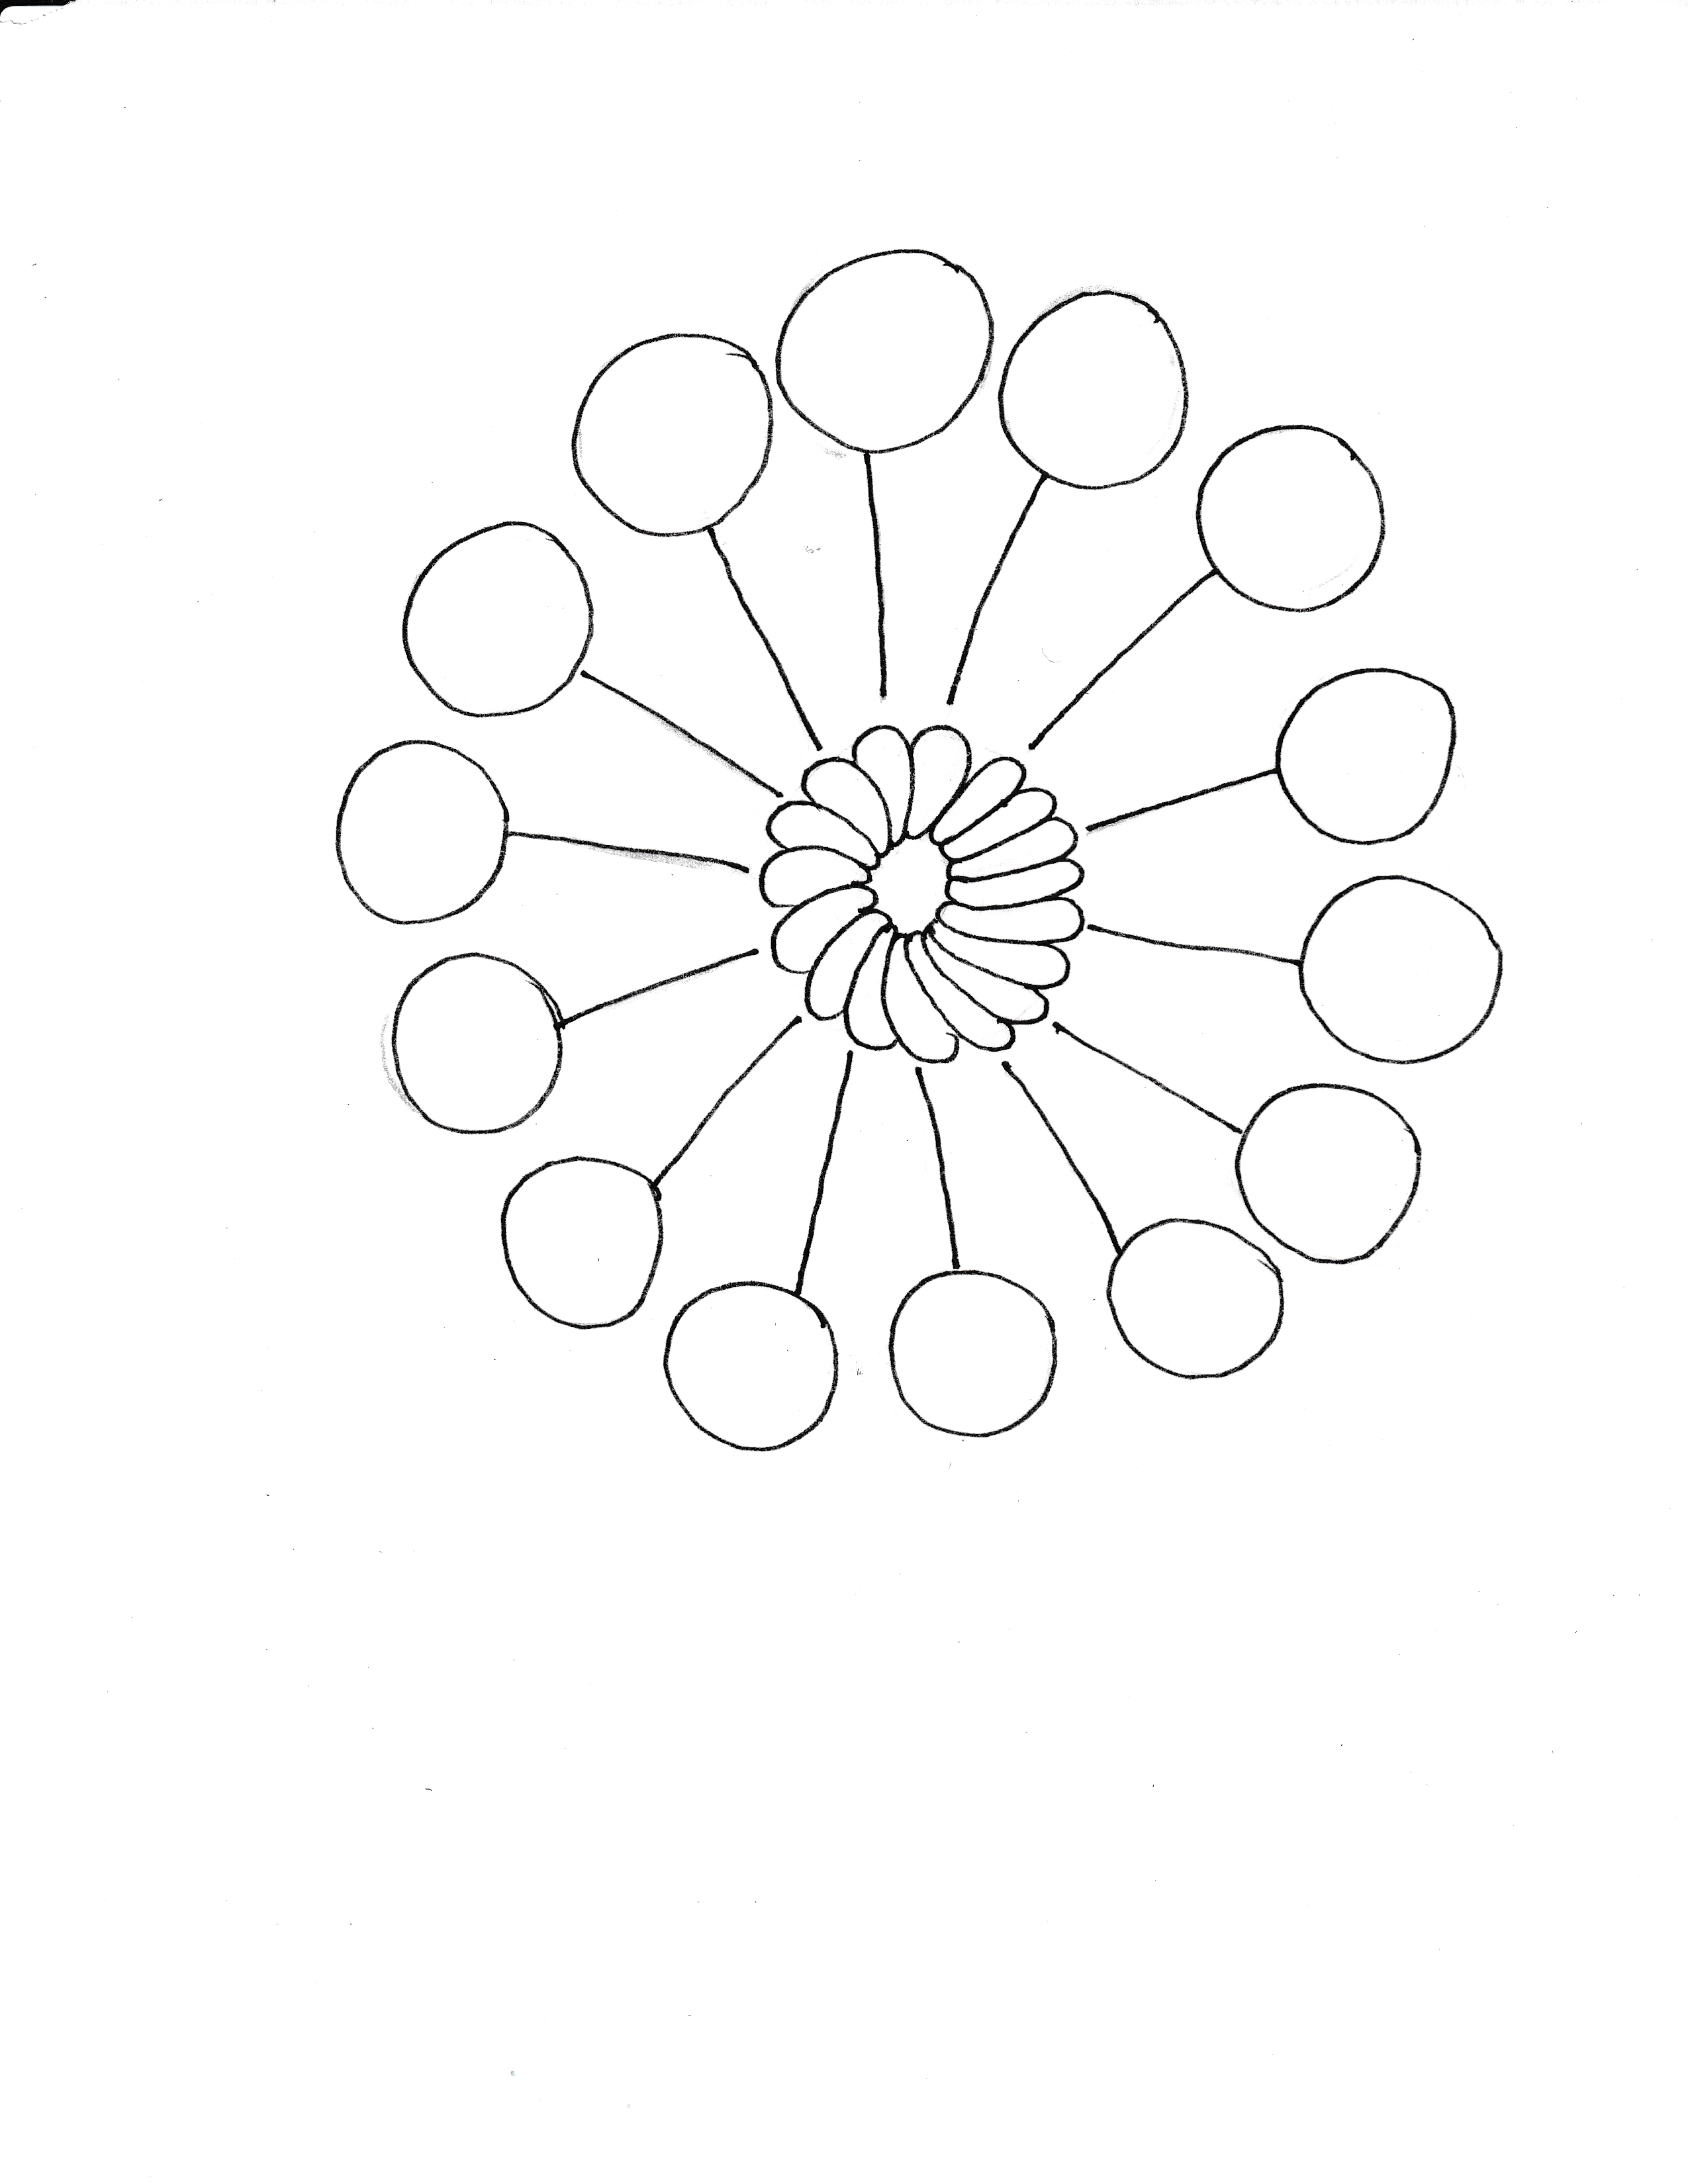
Meharki:
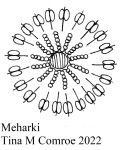
Stitches: Center Chikna Phanda with Sada Murri and Dhari Phanda on outer ring.
Bulbul Chashm: Nightingale’s Eye

Stitches: small Hool at the center surrounded by large Phanda with stems.
Peepal Patta: Holy Pepal Leaf.
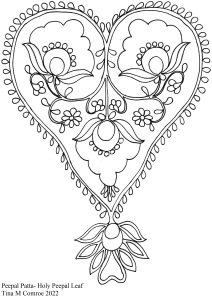
Ficus Religiosa: Sacred Fig or Ashvattha tree in India and Nepal. The sacred fig is considered to have a religious significance in three major religions that originated on the Indian subcontinent, Hinduism, Buddhism, and Jainism. Hindu and Jain ascetics consider the species to be sacred and often meditate under it. This is the tree under which Gautama Buddha is believed to attained enlightenment. The leaf is usually filled in with other floral motifs. (Wikipedia, n.d.)
Stitches: Jaali work, Phanda work, Janjira stitch, Rahet stitch, Bakhia work.
Traditional Layouts and Motifs
Materials Used
These fantastic designs and stitches were embroidered upon a translucent cotton fabric with a weave so fine that it was described as “Woven Air” by Roman author Petronius in the First century CE, the soft and delicate muslin was revered, gifted and worn by Indian royalty since the time of the Indus valley civilization. Among the few places that produced fine muslin in undivided India, Machlipatnam (Andhra Pradesh), Jagatsingpur (Odisha) and Dhaka (Undivided Bengal) were renowned for the gossamer, feather-light and translucent cotton weave. The Arni muslin for the city of Machlipatnam (earlier called Masulipatname, hence perhaps the name “Muslin” although many accord the name to the city of Mosul in Iraq.) The scholar Pliny (CE 23-79) Lamented over the emptying of the treasure (over 500 million sesterces of gold bullion each year) for ‘venti’ or ‘nebula’ from the Indian Gangetic plains.
The closest equivalent is the mulmul sold to Europe and America as cotton voile.
Bibliography
Ajanta Caves. (n.d.). Retrieved from https://en.wikipedia.org/wiki/Ajanta_Caves
Amina Okada, A. B. (1996). Ajanta. In A. B. Amina Okada, Ajanta.
The Absolute Best channel to learn Chican Work: Antrang Creations DIY. (n.d.). Retrieved from https://www.youtube.com/c/AntrangCreationsDIY
Bana. (n.d.). harshacharita of Bana. Retrieved from Archive.org: https://archive.org/details/harsacaritaofban00banaiala/page/n11/mode/2up
Conservation Journal. (n.d.). Retrieved from http://www.vam.ac.uk/content/journals/conservation-journal/issue-52/conserving-the-copies-of-the-ajanta-cave-paintings-at-the-v-and-a/
Dillmont, T. d. (1884). The Complete Encyclopedia of Needlework. Dolfus-Meig Company.
Gochberg, D. S. (1997). World Literature and Though: VolumeI: The Ancient Worlds. In D. S. Gochberg. Fort Worth Texas: Harcourt Brace.
Oudh State. (n.d.). Retrieved from https://en.wikipedia.org/wiki/Oudh_State
Paine, S. (n.d.). Chikan Embroidery: The Floral Whitework of India.
Rigveda Mandala 2 Hymn to Raka. (1500-1000 BCE). Retrieved from Wikipedia: https://en.wikisource.org/wiki/The_Rig_Veda/Mandala_2/Hymn_32
Sharma, N. (2013-2015). Chikankari: Beauty on White. Chikankari: Beauty on White. National Institute of Fashion Technoloty-Mumbai.
Wikipedia. (n.d.). Ficus Religiosa. Retrieved from https://en.wikipedia.org/wiki/Ficus_religiosa
Wilkinson-Weber, C. M. (1999). Womens work and skill in the Lucknow Embroidery Industry. In C. M. Wilkinson-Weber. State University of New York Press.
Footnotes
[1] (Rigveda Mandala 2 Hymn to Raka, 1500-1000 BCE)
[2] (Amina Okada, 1996)
[3] (Ajanta Caves)
[4] (Gochberg, 1997)
[5] http://jameelcentre.ashmolean.org/object/EA1993.35
[6] Harsha Charita of Bana
Pages 95-96
Translated by E.B. Cowell and F.W. Thomas
Published by the Royal Asiatic Society 1897
[7] (Oudh State)
[8] (Sharma, 2013-2015)
[9] Paine, Sheila: Chikan Embroidery: The Floral Whitework of India 1989, pp35.
[10] (Wilkinson-Weber, 1999)
[11] (Dillmont, 1884)